
A Beginner’s Guide to Setting Up CI/CD With Github Actions
February 21, 2021.⏱️ 5 min readIf you are reading this, you or your team probably need a way to run automatic tests, build, deliver and deploy projects faster, well worry no more this is where continuous integration and continuous delivery (CI/CD) with Github Actions comes in. But hold on what does CI/CD mean?
Continuous Integration (CI)
Continuous integration is the practice of automating the integration of code changes from multiple contributors into a single software project. It’s a primary DevOps best practice, allowing developers to frequently merge code changes into a central repository where builds and tests then run.
Continuous Delivery (CD)
Continuous Delivery is when your code is always ready to be released but isn’t pushed to production unless you make the decision to do so. It is a manual step. With Continuous Deployment, any updated working version of the app is automatically pushed to production.
Continuous Deployment (CD)
Continuous deployment is the process by which qualified changes in software code or architecture are deployed to production as soon as they are ready.
Examples of Tools to Use to Perform CI/CD
There are numerous tools to configure and perform CI/CD processes:
Github Actions is a tool that makes it easy to automate software workflows and handles CI/CD processes, introduced in October 2018, launched in beta in August 2019, and finally distributed in November 2019, GitHub Actions is also paid, although it has a free version with some limitations.
Example of Using Github Actions In a Project
For this example, we would be using React Js (Create React App) starter project for demonstration purposes.

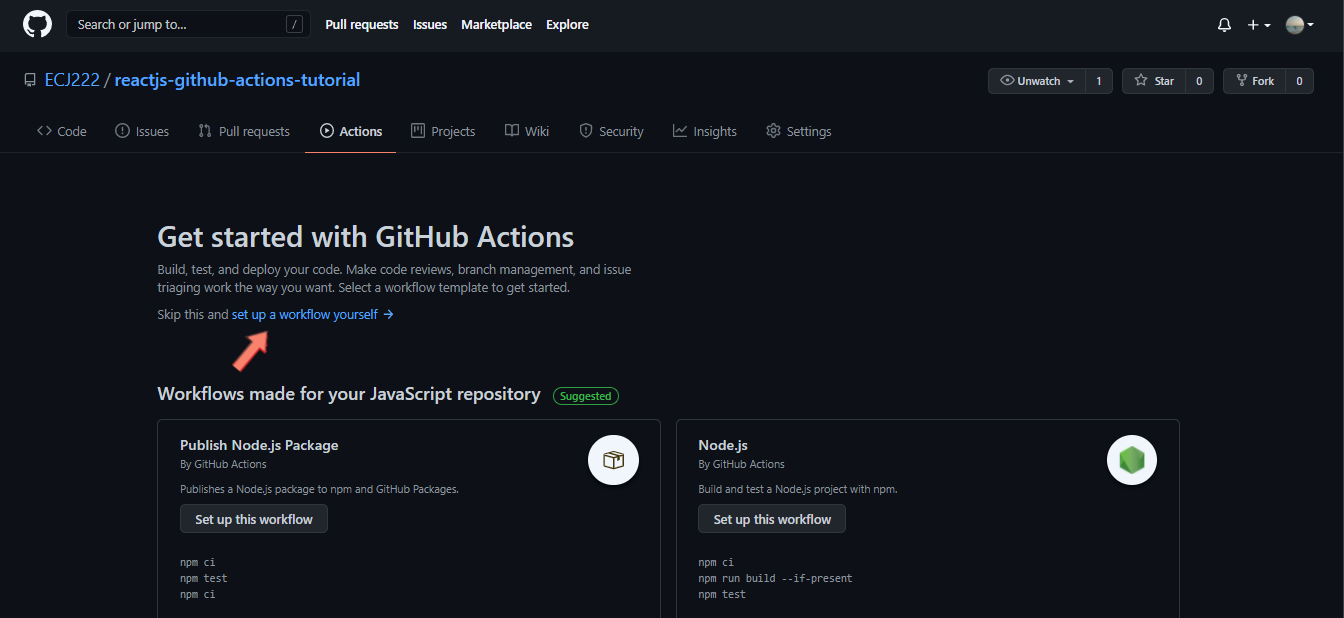
First, we need to enter our GitHub project and access the Actions tab:

We arrive at a screen that allows us to choose between a predefined workflow or an established workflow, In our case, we’ll be using an established workflow.
Notice the workflow in the file called main.ymlwhich is in .github/workflows/ below, this is the default workflow that Github gives us when we establish our own workflow. We can have different files with different workflows.
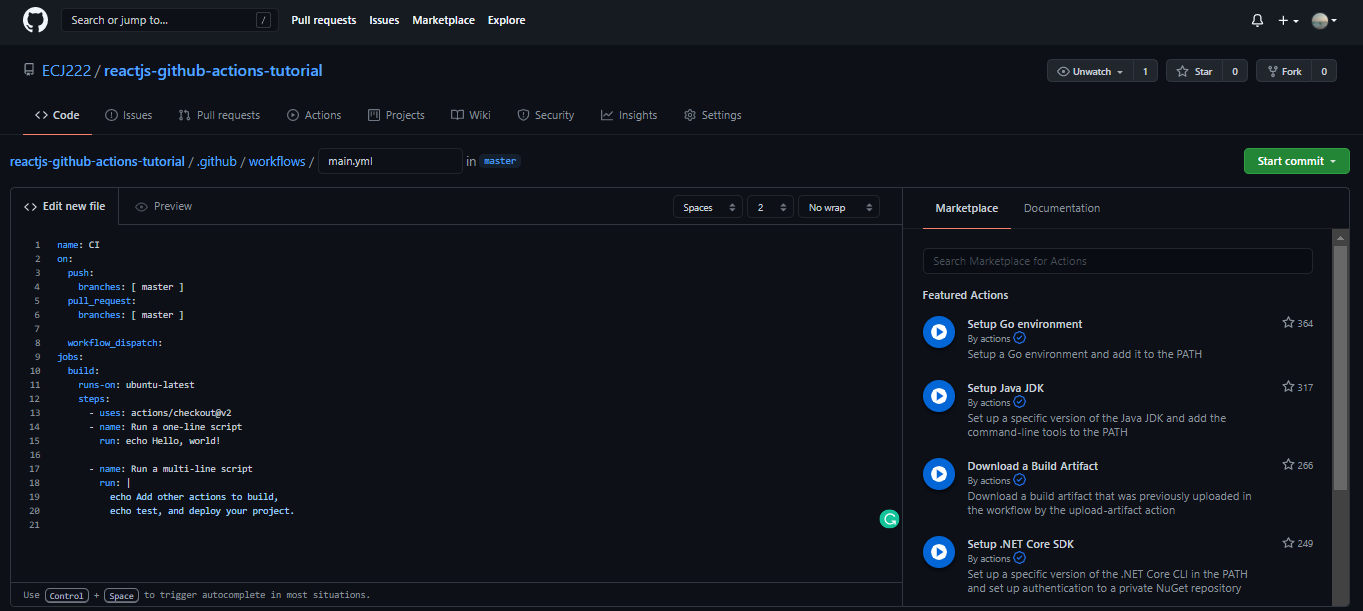
Now we’ll change the content of the file.
name: Lint
on: push
jobs:
run-linters:
name: Run linters
runs-on: ${{ matrix.os }}
strategy:
matrix:
os: [ubuntu-latest]
node: [13.x, 14.x, 15.x]
steps:
- name: Check out Git repository
uses: actions/checkout@v2
- name: Setup node env 🏗
uses: actions/setup-node@v2.1.2
with:
node-version: ${{ matrix.node }}
- name: Install dependencies 👨🏻💻
run: npm ci
- name: Run linter 👀
run: npm run lint
‘name’
It’s a label for our workflow.
‘on’
Github executes workflows that are defined with the on key — in our case, any push event. We can also define a specific branch. For example, push events in the master branch:
on:
  push:
    branches:
      - master
‘jobs’
Each workflow is made up of one or more jobs. In our case, there’s only one.
‘runs-on’
This parameter contains the type of virtual machine in which the code will be executed. In this case, we’ll use ubuntu-latest(To see the different types of virtual machines available).
‘strategy’ and ‘matrix’
A strategy creates a matrix of environments in which to execute the work. Each matrix allows us to establish a set of different configurations of the virtual environment.
‘steps’
A step is a sequence of tasks. In the example we’re seeing, the first step is to check the repository that triggered the push event so the workflow can access it.
- name: Check out Git repository
  uses: actions/checkout@v2
In the second step, the workflow is set up with a version of node.js to execute the application.
- name: Setup node env 🏗
  uses: actions/setup-node@v2.1.2
  with:
    node-version: ${{ matrix.node }}
In the third step, the workflow installs all our dependencies that are needed for our application with the npm ci command, for more information on the command I highly recommend you check the documentation.
- name: Install dependencies 👨🏻💻
run: npm ci
Finally, we have arrived at the last step.
In the last step, we use the linter tool which is a tool that analyzes our code to flag programming errors, bugs, stylistic errors, and overall helps to improve our code.
- name: Run linter 👀
  run: npm run lint
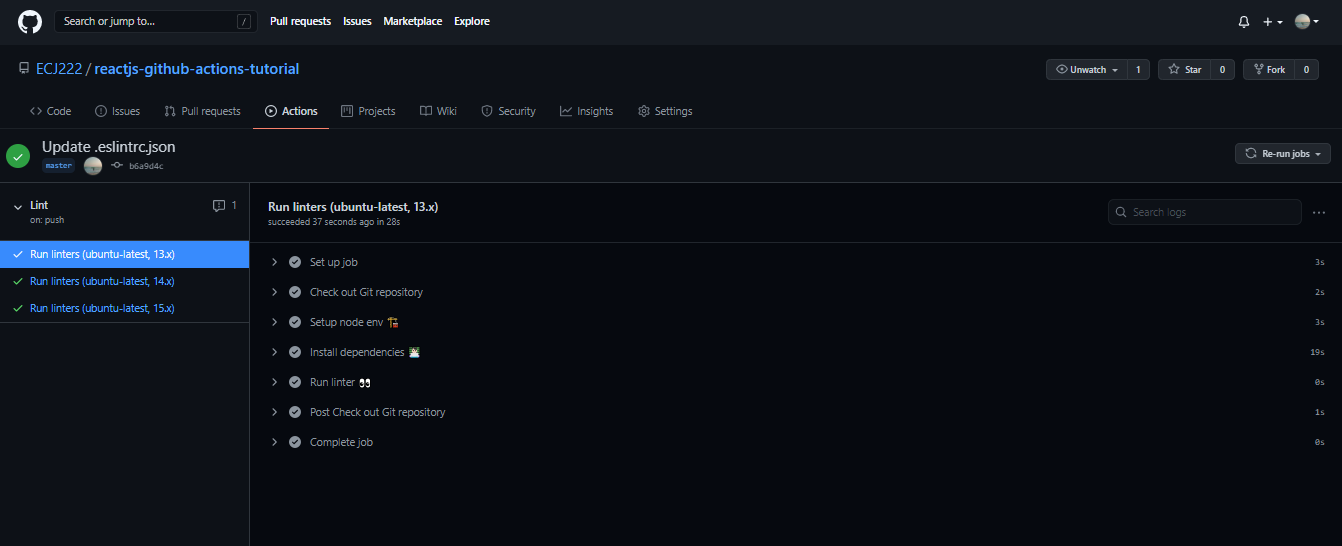
Whenever we push code to our repository this workflow will run, when we access the Actions tab of the repository again, we can see a list of the times the workflow has been executed. In this case, if no error has occurred, we obtain the following:
Conclusion
Github Actions is one of the best ways to create and maintain a Continuous Integration/Continuous Delivery/Continuous Deployment (CI/CD) workflow, it's definitely a feature that is worth getting excited about. It facilitates easier development workflow by handling a number of steps.